
How do you adjust the temperature on a wireless thermostat
author: Lily
2025-03-15
How to Adjust the Temperature on a Wireless Thermostat

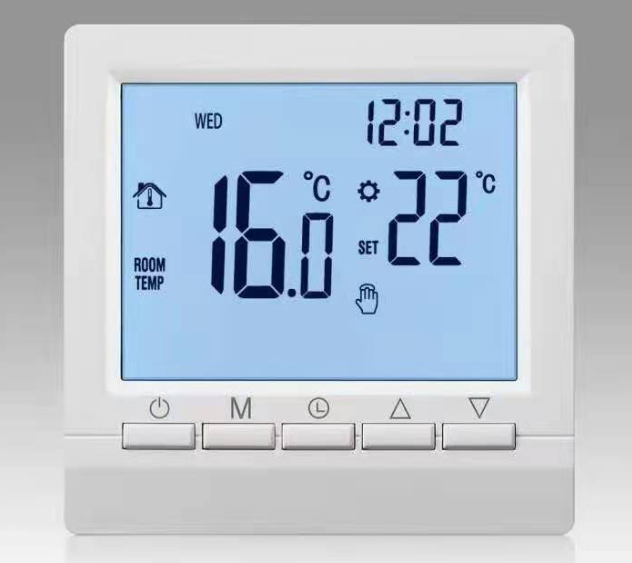
Wireless thermostats have transformed the way we control indoor temperatures, offering a blend of convenience and efficiency. While their operation is designed to be user - friendly, the process of adjusting the temperature may differ slightly based on the specific brand and model. Here is a comprehensive guide to help you navigate this task with ease.
Step 1: Locating Your Wireless Thermostat
The initial step is to pinpoint the location of your wireless thermostat within your home. It is typically installed on a wall in a central area. This is because a central location allows the thermostat to accurately sense the average temperature of the living space. For example, in a two - story house, you might find it on the main floor, perhaps in the living room or a hallway that serves as a traffic hub. By being centrally placed, it can provide a more representative reading of the overall ambient temperature, ensuring that the heating or cooling system adjusts the temperature evenly throughout the house.
Step 2: Powering Up the Thermostat
Once you've located the thermostat, the next crucial step is to ensure it's powered on. A significant number of wireless thermostats rely on batteries for operation. If you notice that the thermostat's display is blank or unresponsive, the first thing to check is the battery status. Most thermostats will indicate low battery levels on the display, usually with a small battery icon that may start to blink or show a reduced charge symbol. If the batteries are indeed low, replacing them is a simple task. Just open the battery compartment, which is often located on the back or bottom of the thermostat, and insert new batteries, making sure to match the correct polarity as indicated. Once the new batteries are in place, the thermostat should power up, and the display will light up, presenting information such as the current room temperature, the set temperature (if previously set), and sometimes additional details like the time or the mode the thermostat is in (heating, cooling, or auto).
Step 3: Entering the Temperature Adjustment Mode
The method of entering the temperature adjustment mode varies among different thermostat models. For those with traditional button - based interfaces, you'll typically find dedicated “Up” and “Down” arrow buttons. Pressing either of these buttons will initiate the temperature adjustment process. In some cases, you may need to hold the button for a second or two to activate the mode. When you do, the thermostat's display will usually change to show the current temperature in a mode where it can be modified.
On the other hand, modern touch - screen thermostats have a more intuitive approach. To enter the temperature adjustment mode, you simply tap on the temperature display area. This action will bring up a set of controls on the screen. These controls can range from a simple slider bar that you can drag up or down to change the temperature to a numerical keypad if you prefer to input the exact temperature value directly.
Step 4: Adjusting the Temperature
If you're using a thermostat with arrow buttons, increasing or decreasing the temperature is a matter of pressing the appropriate button. Each press will increment or decrement the temperature by a pre - set amount, commonly 1°F or 1°C. As you press the button, you'll notice the temperature value on the display changing in real - time. This allows you to precisely set the temperature to your desired comfort level.
For touch - screen thermostats, the process is equally straightforward. If using the slider bar, you can use your finger to slide it up to increase the temperature or down to decrease it. The display will show the temperature value changing as you move the slider. In the case of a numerical keypad, you simply tap the numbers to input the desired temperature. Some touch - screen thermostats also offer additional features, such as the ability to quickly set a temperature presets for different times of the day or for specific activities like “sleep mode” or “away mode”.
Step 5: Saving the Setting
Once you've adjusted the temperature to your liking, the final step is to ensure the setting is saved. In most cases, the thermostat will automatically save the new temperature setting as soon as you stop making adjustments. However, it's always a good idea to double - check. Some models may require you to press a “Set” or “Confirm” button to finalize the change. This button is usually clearly labeled on the thermostat's interface, whether it's a physical button on a non - touch model or an on - screen button on a touch - screen thermostat. After pressing the confirm button, the thermostat will briefly display the new set temperature to confirm that the change has been successfully saved. Now, your heating or cooling system will work to maintain the newly set temperature, creating a more comfortable living environment in your home.


What is a remote household thermostat
What is a PTAC thermostat
Related Article

This shift has made traditional, manual thermostats obsolete, paving the way for advanced smart technologies.
Why You Need a Smart Thermostat

A true 7 Day programmable room thermostat offers the ultimate granular control. It allows users to program a distinct, customized heating and cooling schedule for every single day of the week.
How a 7 Day Programmable Room Thermostat Maximizes Home Comfort and Efficiency

A premium Riseem thermostat is not just a digital display on your wall; it is the ultimate gatekeeper of your indoor environment.
Why a Quality Thermostat Is the Key to a More Comfortable Home

While the TUYA app provides the elegant interface, the physical thermostat remains the brain of the operation. Riseem has engineered a device that looks minimalist on your wall while delivering industrial-grade precision to your HVAC equipment.
Welcome to the Future of Home Automation The Ultimate Guide to TUYA WIFI Smart Thermostats