
how does a thermostat go in
author: Lily
2025-04-28
How Does a Thermostat Go In
Installing a thermostat might initially seem like a complex and intimidating task, but with the right approach and knowledge, it can be accomplished smoothly. Whether you're upgrading to a new model or replacing a malfunctioning one, understanding the installation process is key. Let's delve into the details of how a thermostat is installed, covering everything from preparation to troubleshooting.
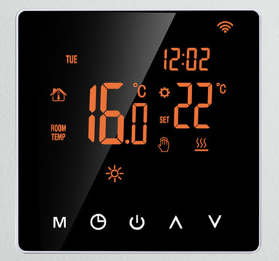
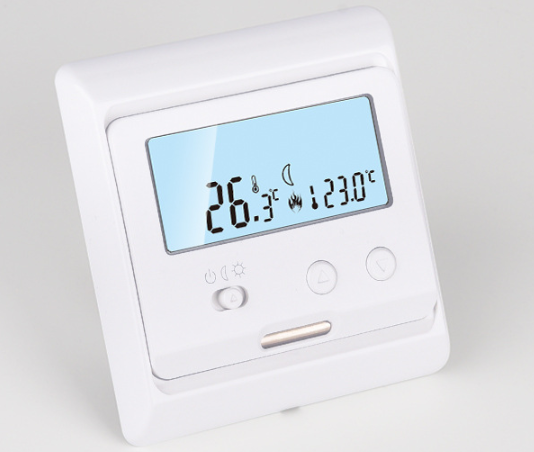
Preparation for Thermostat Installation
Before you even pick up a tool, several crucial preparations must be made. The first and most important step is to turn off the power to your heating and cooling system at the circuit breaker. This is non - negotiable, as working on a live electrical system can lead to severe electrical shocks or even fires. Once the power is safely cut off, gather the necessary tools for the job. A standard set includes a screwdriver, which you'll use to remove and attach the thermostat to the wall; wire strippers, essential for exposing the wire ends for proper connections; and a voltage tester, to double - check that there's no electrical current flowing through the wires.
Next, take the time to carefully read the installation manual that comes with your new thermostat. Each model has its own unique features and requirements, and the manual will provide specific instructions regarding compatibility with your existing heating and cooling setup. This step helps avoid common mistakes, such as connecting the wires incorrectly. Finally, remove the old thermostat from the wall. Unscrew the cover, and as you disconnect the wires, make sure to note their positions precisely. Taking a clear photograph can serve as a handy reference during the installation of the new thermostat. After that, remove the base plate from the wall, leaving the wires exposed and ready for the new installation.
Installing a Basic Non - Programmable Thermostat
With the preparations out of the way, it's time to start installing the new thermostat. Begin by attaching the mounting plate of the new non - programmable thermostat to the wall using the screws provided. It's vital to ensure that the plate is level; an uneven mounting can lead to inaccurate temperature readings and improper functioning of the thermostat.
Once the mounting plate is securely in place, it's time to connect the wires. Wires are often color - coded to simplify the connection process. Typically, the red wire connects to the “R” terminal, which supplies power to the thermostat. The white wire is usually connected to the “W” terminal, which controls the heating system, while the yellow wire is attached to the “Y” terminal for the cooling system. After making the connections, gently tuck the wires back into the wall cavity to keep them organized and prevent any damage. Then, attach the thermostat to the mounting plate. Finally, head back to the circuit breaker and turn the power back on. Check if the thermostat powers on and starts functioning correctly. If it does, you've successfully installed your basic non - programmable thermostat.
Installing a Programmable Thermostat
The process of installing a programmable thermostat shares many similarities with that of a basic non - programmable one. The initial steps of turning off the power, gathering tools, removing the old thermostat, and connecting the wires to the new mounting plate are the same. However, the key difference lies in the programming aspect.
Most programmable thermostats feature a menu - driven interface that allows you to set up customized temperature schedules. Use the buttons on the thermostat to navigate through the menu options. You can set different temperatures for various times of the day and different days of the week. For example, you might program it to lower the temperature at night when you're sleeping to save energy, and then raise it an hour before you wake up in the morning to ensure a comfortable start to your day. Some advanced programmable thermostats even let you create separate schedules for weekdays and weekends, tailoring the temperature settings to your specific routine. Make sure to follow the detailed programming instructions in the manual closely to get the most out of your thermostat's capabilities.
Installing a Smart Thermostat
Smart thermostat installation combines the steps of basic and programmable thermostat installations, with an additional crucial step: connecting to your home's Wi - Fi network. After completing the physical installation and wire connection, the next step is to download the corresponding mobile app for your smart thermostat model. The app is the gateway to unlocking the full range of features offered by your smart thermostat.
Open the app and follow the on - screen instructions carefully. This usually involves entering your Wi - Fi password and other network details to connect the thermostat to your home network. Once connected, you can further customize the thermostat's settings through the app. You can set temperature schedules, adjust fan speeds, and even monitor and analyze your energy usage. Some smart thermostats can integrate with other smart home devices, such as voice assistants or smart lighting systems. This integration allows you to control your entire smart home ecosystem from a single app, providing unparalleled convenience and energy management.
Troubleshooting When the Thermostat Doesn't Work
Despite following all the installation steps correctly, there's a chance that your thermostat might not work as expected. When this happens, start by double - checking the power supply. Ensure that the power is turned on at the circuit breaker and that the thermostat is properly connected to the power source. Sometimes, a simple oversight like forgetting to flip the breaker back on can cause the problem.
Next, examine the wire connections. Make sure that all the wires are securely attached to the correct terminals. Even a slightly loose connection can disrupt the flow of electricity and prevent the thermostat from functioning. If any wires seem loose, gently tighten the terminal screws, but be careful not to overtighten and damage the wires.
If the problem persists, use a voltage tester to check if power is reaching the thermostat. If there's no power, it could indicate an issue with the wiring in your home's electrical system. In such cases, it's best to consult a professional electrician, as electrical wiring problems can be complex and dangerous to handle on your own. Also, if your thermostat uses batteries, ensure that they are fresh and installed correctly, as weak or incorrectly placed batteries can also cause malfunctioning.
Safety Precautions During Thermostat Installation
Safety should always be a top priority during thermostat installation. As mentioned earlier, never start working on the thermostat without first turning off the power to the heating and cooling system at the circuit breaker. Use a voltage tester to confirm that there is no electrical current flowing through the wires before touching them.
When handling screws and small parts, be cautious not to drop them into the wall cavity. Retrieving these items can be extremely difficult and may require professional assistance. If you're unsure about any part of the installation process, especially when dealing with electrical components, it's highly recommended to hire a professional technician. They have the expertise and experience to ensure a safe and proper installation, reducing the risk of accidents and damage to your equipment.
In conclusion, installing a thermostat involves careful preparation, following specific steps for different types of thermostats, and being aware of potential issues and safety precautions. With the right approach, you can successfully install a thermostat and enjoy the benefits of a well - regulated home temperature.


air conditioner thermostat not working
how do i get my thermostat out of program mode
Related Article

This shift has made traditional, manual thermostats obsolete, paving the way for advanced smart technologies.
Why You Need a Smart Thermostat

A true 7 Day programmable room thermostat offers the ultimate granular control. It allows users to program a distinct, customized heating and cooling schedule for every single day of the week.
How a 7 Day Programmable Room Thermostat Maximizes Home Comfort and Efficiency

A premium Riseem thermostat is not just a digital display on your wall; it is the ultimate gatekeeper of your indoor environment.
Why a Quality Thermostat Is the Key to a More Comfortable Home

While the TUYA app provides the elegant interface, the physical thermostat remains the brain of the operation. Riseem has engineered a device that looks minimalist on your wall while delivering industrial-grade precision to your HVAC equipment.
Welcome to the Future of Home Automation The Ultimate Guide to TUYA WIFI Smart Thermostats